Studio Setup India – Step‑by‑Step Guide to Your Own Photo Studio
Thinking about opening a photo studio in India? You don’t need a huge vault or a million‑dollar budget. Start with the space you have, pick the right lights, and add a few key pieces of equipment. In this guide we break down everything you need to know, from choosing a room to pricing the essentials.
Pick the Right Space and Layout
The first decision is where you’ll work. A spare bedroom, a small shop, or even a garage can become a studio if you plan the layout right. Measure the floor area, note any windows, and decide where the main backdrop will go. Keep the shooting area free of clutter and leave at least three feet around the subject for movement. If you have natural light, use it for soft portraits, but make sure you can block it with curtains when you need full control.
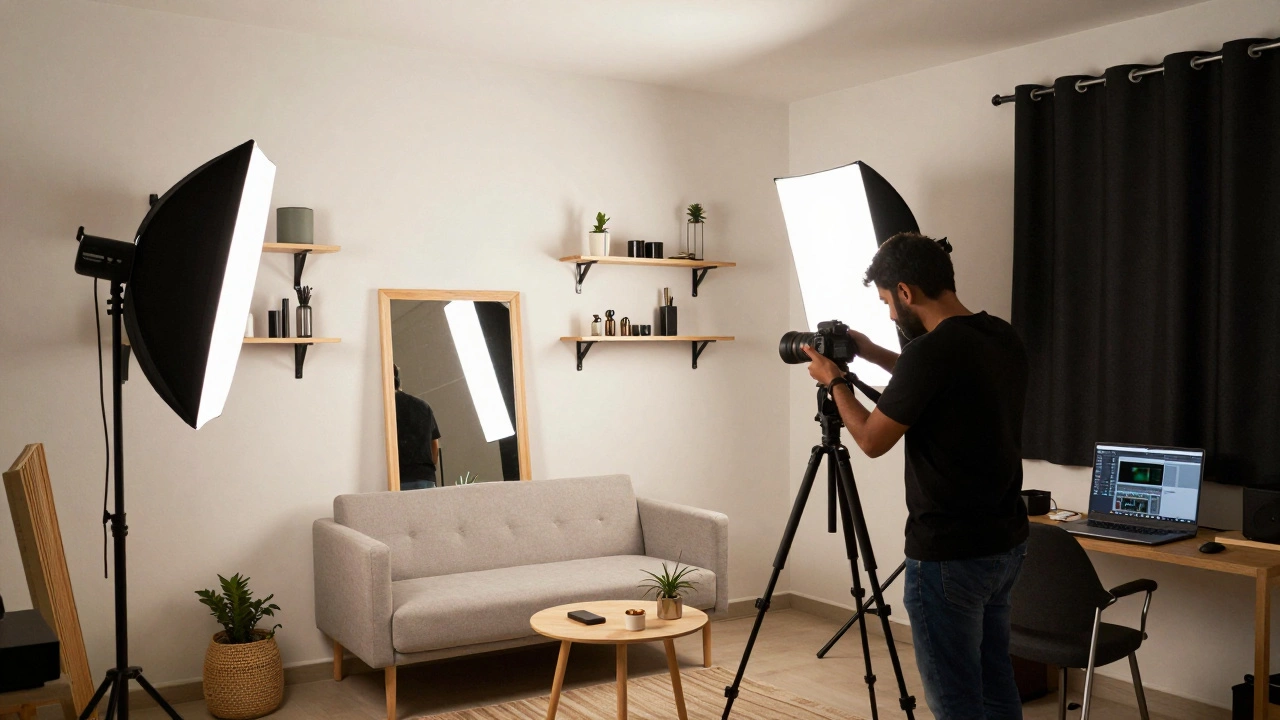
Lighting Essentials That Won’t Break the Bank
Good lighting is the heart of any studio. A basic set of two softbox lights with stands gives you a three‑point setup: key, fill, and backlight. Look for LED softboxes – they run cool, use less electricity, and last longer than old‑school tungsten units. Add a cheap reflector (even a white foam board works) to bounce light and fill shadows. If you can splurge a little, a portable strobe with a wireless trigger adds power for higher‑speed shoots.
Next, think about background options. A roll of seamless paper (white, gray, or black) is cheap and easy to swap. For a more versatile look, get a collapsible backdrop system that can hold fabric, paper, or vinyl. Mount it on a wall or a simple stand – just make sure it’s stable and wrinkle‑free.
Now, gear up with the basics. A mid‑range DSLR or mirrorless camera plus a prime lens (50mm or 85mm) covers most portrait work. Add a tripod for stable product shots and a remote trigger for shake‑free exposures. Remember, you can upgrade lenses later; focus on a solid camera body first.
Don’t forget storage and workflow. A sturdy external hard drive keeps your files safe, and a simple editing software like Lightroom or a free alternative handles color correction and retouching. Organize your files by client and date – it saves hours when you need to locate a photo quickly.
Budget planning is easier than you think. Allocate 40% of your budget to lighting, 30% to camera gear, 20% to backdrops and accessories, and the last 10% to storage and software. Look for deals on e‑commerce sites, second‑hand markets, and local photography stores in Mumbai or Delhi. Buying used but well‑maintained gear can cut costs by half without sacrificing quality.
Finally, test the setup before you take on clients. Shoot a friend, adjust the lights, move the backdrop, and check the results on your screen. Small tweaks – like moving a softbox a few inches or adding a diffuser – can make a big difference. Once you’re happy with the look, start promoting your studio on social media, local forums, and word of mouth.
Setting up a studio in India is all about smart choices. Use the space you have, invest wisely in lighting, keep the gear simple, and stay organized. Follow these steps and you’ll have a professional‑looking studio that attracts clients without draining your savings.