Passport Photo Checker
Check Your Photo Requirements
Getting a passport photo taken can feel like a hassle-especially when you need it urgently, the photo studio is closed, or you’re tired of paying ₹200 just for two small pictures. The good news? You can take a perfect passport-sized photo on your own, using nothing more than your smartphone, a plain wall, and a few simple tools. No studio needed. No appointment. No extra cost.
Why Your Passport Photo Gets Rejected
Before you snap a picture, know what gets rejected. The Indian passport office has strict rules. If your photo doesn’t match them exactly, you’ll be asked to resubmit-and that delays your application. Common reasons for rejection:- Background isn’t plain white or off-white
- Shadows on your face or behind you
- Wearing glasses (unless medically necessary)
- Smiling, frowning, or showing teeth
- Head too small or too large in the frame
- Wearing hats, headscarves, or religious coverings (unless for medical/religious reasons and approved)
- Photo is blurry, pixelated, or overexposed
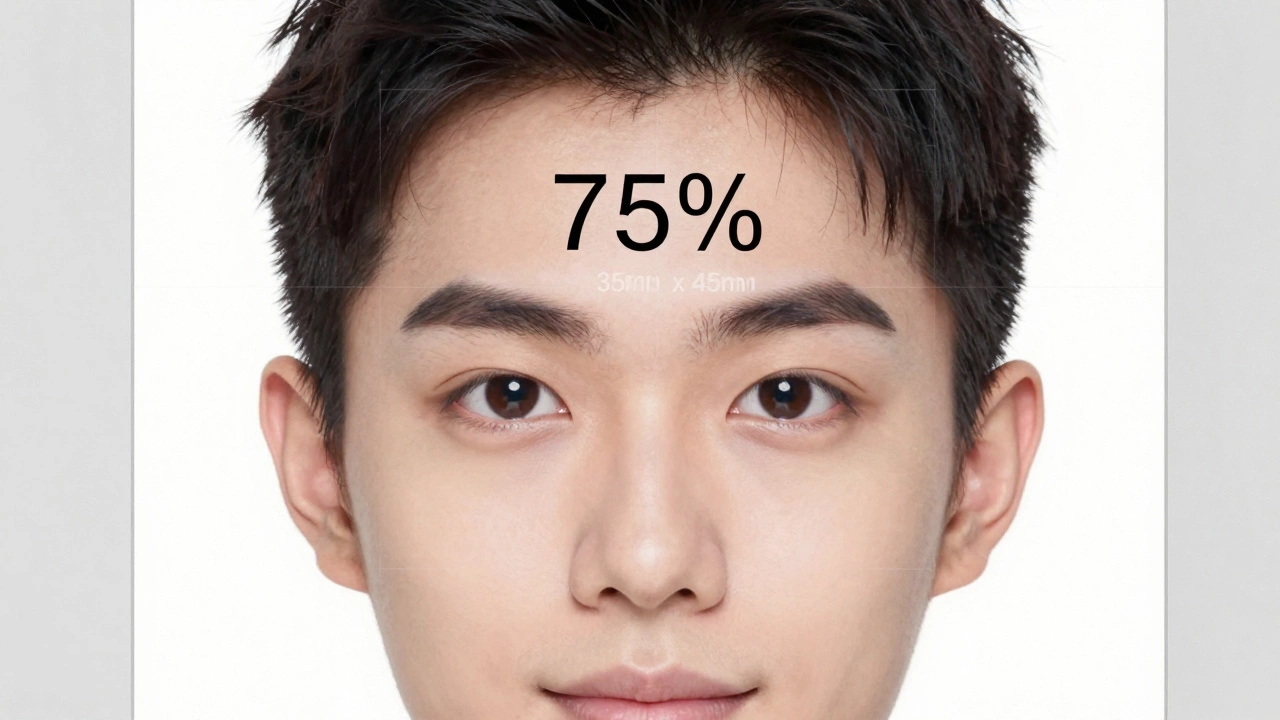
These aren’t suggestions. They’re rules. The photo must be 35mm x 45mm, with your head taking up 70-80% of the frame. Your eyes must be open, looking straight at the camera, and your expression neutral.
What You Need to Get Started
You don’t need expensive gear. Here’s what works:- A smartphone with a rear camera (better than front-facing for quality)
- A plain white or off-white wall (no patterns, no windows behind you)
- A plain white sheet or paper (to tape to the wall if needed)
- A chair or stool (to sit on so you’re at eye level with the camera)
- A tripod or stack of books (to hold your phone steady)
- A remote shutter app (like Camera FV-5 or the built-in timer on your phone)
- Good lighting-natural light from a window is best
Don’t use flash. It creates harsh shadows and shiny skin. Don’t use phone filters or portrait mode. They blur backgrounds and distort faces. Keep it simple.
Step-by-Step: How to Take the Photo
Follow these steps exactly. One mistake and you’ll have to start over.- Set up your background. Tape a clean white sheet or paper to a plain wall. Make sure there are no shadows, posters, or furniture visible behind you.
- Position your chair. Sit on a chair about 1 meter (3 feet) away from the wall. Your head should be centered, and your shoulders should be square to the camera.
- Place your phone. Mount it on a tripod or stack of books so the lens is at eye level. The camera should be exactly facing you-no tilting up or down.
- Lighting is critical. Sit facing a large window. Natural daylight is the best. Avoid direct sunlight-it creates harsh shadows. If it’s cloudy, that’s actually better. No lamps, no overhead lights. If you must use artificial light, use two soft lamps on either side of you, not behind the camera.
- Dress properly. Wear normal clothes. No uniforms, no white shirts (they blend into the background). No jewelry that reflects light. No makeup that looks heavy. Your face should look like you normally do.
- Set your camera. Use the rear camera. Turn off portrait mode, beauty mode, HDR, and filters. Set resolution to the highest. Use manual mode if you can-set exposure to -0.3 to avoid overexposure.
- Use the timer. Set a 5-second timer. Stand back, sit straight, relax your face. No smile. No frown. Eyes open, looking directly into the lens. Breathe out slowly and stay still.
- Take 5-10 photos. Don’t settle for one. Try again if your eyes blink, your head tilts, or your shoulders aren’t straight.

How to Crop and Check Your Photo
After you’ve taken the photos, pick the best one. Then crop it to exact passport size.Use a free app like Passport Photo Maker (Android/iOS) or Canva. Upload your photo. Select India Passport as the template. The app will auto-crop it to 35mm x 45mm and check if your head size is correct. It will also flag if the background isn’t pure white.
Check these details manually too:
- Your head height should be between 32mm and 36mm from chin to top of head
- Your eyes should be 28mm to 34mm from the bottom of the photo
- The background must be 100% white-no gray, no texture, no shadows
- The photo must be in color, not black and white
- File format must be JPEG, under 10MB
Open the photo on your computer. Zoom in to 200%. Look for pixelation. If your face looks fuzzy, discard it. The photo must be sharp.
What to Avoid at All Costs
Here are the biggest mistakes people make:- Using a mirror selfie-the angle is wrong, lighting is bad, and the background is never clean
- Taking it in front of a window-you’ll be silhouetted
- Wearing a hoodie or scarf-even if it’s cold
- Editing the photo in Instagram or Snapchat-they change skin tones and blur edges
- Printing at a local shop without checking the size-most printers don’t crop to passport specs
One person in Mumbai tried using a mirror selfie last month. Their application was rejected. They had to wait 12 more days for a new appointment. Don’t be that person.
When to Use a Professional Service
If you’ve tried this and it still doesn’t work, or you’re applying for a visa with stricter rules (like the US or UK), it’s worth paying ₹150-250 at a passport photo center. Places like Photo Studio India or Shutterfly in Mumbai have machines that auto-check compliance. But even then, ask them to show you the final crop before printing.Most people think professional means better. But with the right setup, your phone photo is just as good-if not better-because you control the lighting and expression.
Final Checklist Before You Submit
Before you upload your photo to the passport portal, run through this:- Is the background pure white?
- Is your face centered and fully visible?
- Are your eyes open and looking straight ahead?
- Is your expression neutral (no smile)?
- Are your shoulders level?
- Is the photo 35mm x 45mm?
- Is the file under 10MB and in JPEG format?
- Did you test it on your phone screen? Zoom in-does it look sharp?
If you answered yes to all, you’re ready. Submit it. No second chances needed.
What If You’re Still Not Sure?
If you’re still unsure, upload your photo to the Passport Seva Portal’s preview tool. It won’t approve it, but it will tell you if your photo fails basic checks like size or background. Use it as a free sanity check before you pay for printing or submit your application.There’s no magic to this. It’s just precision. Same as measuring ingredients for a recipe. Get the details right, and the outcome works.
Can I wear glasses in my passport photo?
You can wear glasses only if you wear them daily for medical reasons. The frames must not cover your eyes, and there must be no glare or reflection on the lenses. If you can, it’s better to remove them. Many people get rejected because of reflections, even if they think they’re minor.
Can I take a passport photo with my iPhone?
Yes, absolutely. iPhones from the iPhone 8 onwards have rear cameras that produce high-resolution images suitable for passport photos. Use the rear camera, turn off Portrait Mode, and shoot in natural daylight. Avoid using filters or editing apps that alter your face.
Do I need a white background or can I use light gray?
The background must be plain white or off-white. Light gray is not acceptable. Even a slightly grayish tone will cause rejection. Use a white sheet or paper taped to a wall. Test it by taking a photo in daylight-if it looks white on your screen, it’s good.
Can I use a selfie stick to take the photo?
No. Selfie sticks create the wrong angle. Your head will look tilted, and your shoulders won’t be square to the camera. The passport office requires a straight-on view. Use a tripod or stack of books to hold your phone at eye level instead.
What if my photo is rejected after submission?
If your photo is rejected, you’ll get a notification via email or SMS. You can upload a new photo through the Passport Seva Portal without paying again. Make sure the new photo meets all the rules exactly. Don’t rush-double-check size, lighting, and background before uploading.