If you’ve ever tried getting a passport photo taken at a pharmacy or photo booth, you probably wondered if there’s an easier—and cheaper—way. The answer is yes; you can resize your own photo to passport size right from your phone or laptop in just a few minutes. No driving, no waiting in line, no more awkward face you secretly hate.
The trick is knowing exactly what size you need, and which websites or apps make it ridiculously simple. Whether you’re applying for a passport, visa, or even a student ID, most places want a very specific size—usually 2x2 inches in the US, or 35x45mm in many other countries. Get it wrong, and your application can be rejected on the spot. Not fun.
Don’t worry about being a design pro. Most online tools for passport photo resizing let you upload any halfway decent headshot (yes, even a selfie if you follow a few rules). These tools will auto-crop, position your head, and even brighten things up so you don’t look like you just woke up from a nap. I’ve tried them myself—some are free, others cost as little as your daily coffee.
- Why Passport Size Matters
- Measurements You Need to Know
- Best Free Tools and Websites
- Step-by-Step: Resizing Your Photo Online
- Common Mistakes (and How to Avoid Them)
- Printing or Saving for Digital Submission
Why Passport Size Matters
So, why does everyone insist on a specific size for passport photos? Governments around the world set strict rules for passport photos, and size is at the top of the list. If your picture isn't the right size, it's headed straight for the reject pile—yep, even if you nailed the outfit and smile.
Most passport offices use photo scanners and automated systems that check if your picture lines up with certain guidelines. The photo isn’t just for looks—border agents, automated kiosks, and even facial recognition systems count on those measurements to do their job.
- The US requires passport photos to be exactly 2 x 2 inches (51 x 51 mm).
- In the UK and most of Europe, the accepted size is 35 x 45 mm.
- Canada uses 50 x 70 mm, which is taller than most people expect.
Your face must fit within a certain area of that frame, and your eyes and chin should be a specific distance apart, too. Even a slightly wrong crop can throw off identification systems.
Here’s a quick peek at some common passport photo requirements around the world:
| Country | Photo Size | Background |
|---|---|---|
| USA | 2x2 inches (51x51 mm) | Plain white or off-white |
| UK | 35x45 mm | Plain light grey or cream |
| India | 2x2 inches (51x51 mm) | White |
| Canada | 50x70 mm | Plain white |
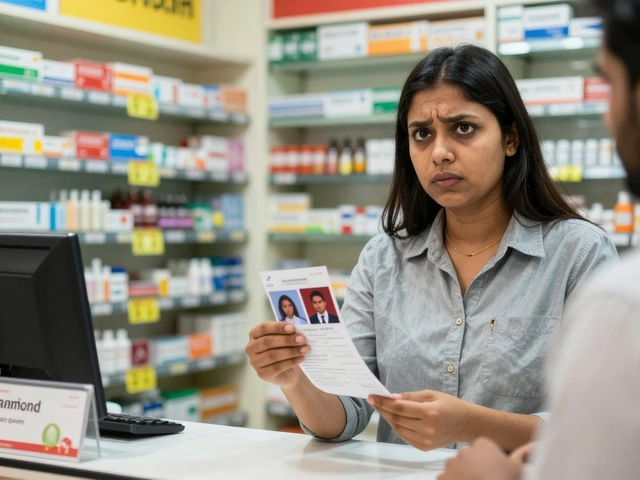
If you upload anything other than the required size when using an online passport service, you’ll get flagged and sent back to square one. And there’s no mercy: even professional studios have their photos rejected sometimes. That’s why passport photo resize is so important—it’s not just about shrinking a file, it’s about making sure your photo actually works for the official process.
Measurements You Need to Know
Before you start resizing, you need the right numbers. No guesswork allowed—every country has its own rules about what a passport photo should look like, and these are serious business. Mess up the size, and your application just gets delayed or even rejected. So, let’s talk specifics.
For folks in the United States, the standard passport photo must be exactly 2 inches by 2 inches (51mm x 51mm). Most U.S. agencies are strict about this. The head itself—from the bottom of the chin to the top of the head—should be between 1 inch and 1 3/8 inches (25mm to 35mm). Your eyes need to fall somewhere between 1 1/8 inches to 1 3/8 inches from the bottom of the photo. Sounds pretty picky, right? But these numbers really matter.
Other countries have their own sizes. For example:
- India: 2 inches x 2 inches or 51mm x 51mm (common for U.S. visas too)
- UK: 35mm x 45mm
- Canada: 50mm x 70mm
- Australia: 35mm x 45mm
If you’re not in the U.S., always check your country’s requirements before you get started. Don’t just trust Google images—check your government’s actual website.
Here’s a quick cheat sheet of common passport photo sizes around the world:
| Country | Size (mm) | Size (inches) |
|---|---|---|
| USA | 51 x 51 | 2 x 2 |
| UK | 35 x 45 | 1.38 x 1.77 |
| Canada | 50 x 70 | 2 x 2.75 |
| India | 51 x 51 | 2 x 2 |
| Australia | 35 x 45 | 1.38 x 1.77 |
Bottom line: Don’t round the numbers and don’t freestyle. Set your photo editing tool to the exact size for your passport or visa project. A couple of millimeters could make or break your application. If you aren’t sure about head size or eye placement, lots of online passport photo makers show helpful overlays—it’s almost dummy-proof. Use those guides to double-check your finished product before you print or upload anything.
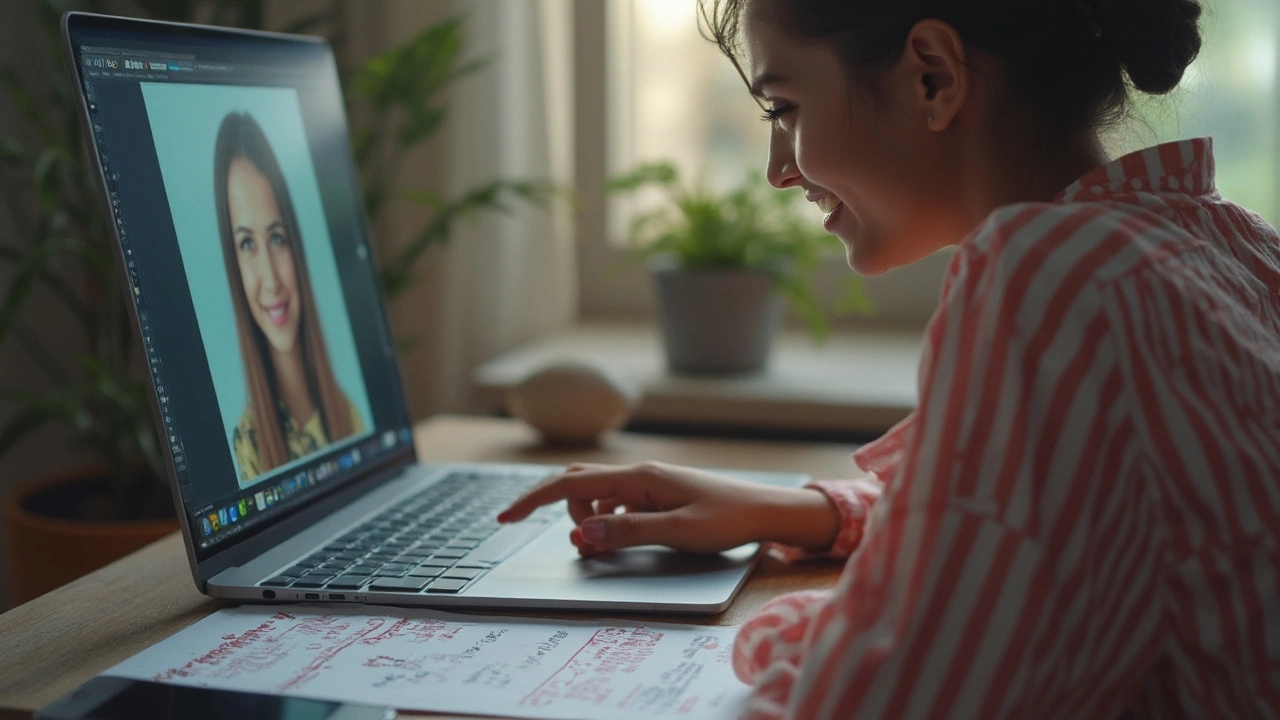
Best Free Tools and Websites
You don’t need Photoshop or fancy software to nail your passport photo resize at home. There are loads of free websites and apps built just for this job. All you need is a photo that meets basic passport rules—neutral face, plain background, good lighting, and nothing covering your face.
Here are some top free tools that actually work:
- IDPhoto4You: This website has a step-by-step wizard that lets you upload your picture, crop it, and download it in passport size for just about any country. It even shows you where your head should fit inside the frame. No signup needed.
- PhotoAiD: The free version lets you upload your photo and uses AI to adjust lighting and background. You’ll get a digital passport photo in the right size. Works from your phone, tablet, or computer.
- Passport-Photo.Online: This one is more polished and supports dozens of countries. Upload your photo, and it will automatically check if your head size, background, and lighting are good to go. The first digital file is usually free, but printing templates may come with a small fee if you want them.
- PersoFoto: A lesser-known but quick and totally free website. Upload, align, and save your photo in a printable size sheet. Great for European passport dimensions.
A quick tip: Always double-check that the country setting matches your application. Passport size varies around the world, and even tiny mismatches can get your application bounced back. Whenever you can, try to use a tool with automatic background removal—helps if you need a super clean result from your phone’s camera.
If you want to go completely no-cost, combine these free tools with standard photo editors like Canva or GIMP to crop and export your photo in the right dimensions, then print it out at your local print shop or pharmacy. Plenty of people (including Meera, my better half) have saved money this way, with no angry passport clerks involved.
Step-by-Step: Resizing Your Photo Online
Getting your picture to proper passport photo resize dimensions doesn't have to be stressful. Even if your only good photo is a quick snap in the living room, you can make it work for most official documents if you follow these clear steps:
- Pick a Reliable Tool: There are plenty of websites and apps out there, but some favorites are idphoto4you.com, Passport Photo Online, and PersoFoto. Most let you choose your country to get the right size right away.
- Upload Your Photo: Hit the upload button and pick a sharp, well-lit headshot. Your face should be centered, and the background needs to be plain (white or off-white work best).
- Select the Size and Country: Almost all passport photo tools allow you to select your country or region and what kind of document you need. This way, they’ll know if you need 2x2 inches for the US, 35x45mm for Europe, etc. Check the table below for a quick guide to common sizes.
- Adjust and Crop: The best tools have guides that show exactly where your chin, eyes, and crown of the head should line up. Drag, pinch, or adjust until your face is inside the template.
- Edit as Needed: Some sites let you tweak brightness, contrast, or blur the background a bit. No heavy edits – just enough so you look clear, with no shadows.
- Download and Save: When it looks right, download your new passport size photo file. Some sites send a print-ready PDF with several copies on one sheet, so you can print at home or at a photo shop.
Here’s a quick table with some standard passport photo sizes for a few countries:
| Country | Standard Size |
|---|---|
| United States | 2 x 2 inches (51 x 51 mm) |
| India | 2 x 2 inches or 35 x 45 mm (varies by document) |
| UK | 35 x 45 mm |
| Canada | 50 x 70 mm |
| Australia | 35 x 45 mm |
Double-check that your final photo matches all the requirements: right size, neutral background, no weird shadows, and your face is visible and centered. Most people get tripped up by not leaving enough space around the head, so don’t crop too tight!
Common Mistakes (and How to Avoid Them)
It’s wild how easy it is to mess up a passport photo resize if you don’t know the rules. Even one small slip-up can mean your photo gets instantly tossed. Here’s where most people blow it, and how you can dodge the usual traps.
- Wrong Size: Tons of folks just guess the size. But consulates or agencies are usually strict: US passport photos must be exactly 2x2 inches (51x51 mm). For Schengen visas, it's 35x45 mm. Double-check the size for wherever your passport or visa is from—don’t assume they’re all the same.
- Bad Crop: The head must fit within a specific portion of the photo. For US passports, your head should measure between 1 inch and 1 3/8 inches from the bottom of the chin to the top of the head. If your forehead is barely there, or your shoulders fill half the space, you’re doomed for rejection.
- Background Issues: No busy backgrounds, no shadows, no patterns. Agencies want a plain white or off-white, with nothing weird in the background. A wall with a shadow or your cat popping into frame isn't going to pass.
- Poor Lighting and Color: If your face looks too dark, washed out, or the color is off, the photo can get bounced. Natural daylight works best, with the light coming from the front. Forget about fancy filters and heavy editing—keep it as natural as possible.
- Expression and Eye Contact: Smirking, pulling a face, or even wearing glasses can get you in trouble. For almost all passports, you need a neutral expression, both eyes open, mouth closed, and no hats (unless for religious reasons with proof).
- Wrong File Format or Size: A lot of countries have digital size rules. For example, the UK passport office accepts only JPEG files under 10MB; anything too big or in the wrong format will get an automatic rejection.
| Mistake | What Happens | How to Fix |
|---|---|---|
| Head too big/small | Photo rejected for wrong proportions | Use auto-crop tools and check the guidelines before uploading |
| Wrong background | Photo rejected instantly | Take photo against a well-lit, plain white wall |
| Wearing glasses | Could cause glares or cover your eyes | Remove glasses for the shot |
| Shadow on face | Could make facial features unclear | Shoot during the day facing a window—avoid harsh overhead lights |
| Poor image quality | Blurry or pixelated = rejected | Use the highest camera resolution, or a recent smartphone |
Here’s a pro tip: most online passport photo creators have built-in guides that highlight your face and check the background for you. If you use their free checkers, you won’t waste time waiting for your application just to get that dreaded rejection email.
Printing or Saving for Digital Submission
Once you’ve resized your image to the exact passport size, what you do next really depends on whether you’re submitting it online or going old school with a printed copy. The last step matters a ton—mess this up, and even the perfect headshot can get rejected. Let’s break it down so you get it right, first try.
If you're printing the photo, pay attention to the guidelines. The U.S. Department of State, for example, only accepts matte or glossy photo paper—regular printer paper is a no-go. A professional print shop or a place like Walgreens or CVS knows what they’re doing, but if you’re printing at home, check that your printer supports high-quality photo paper. Always print at a resolution of at least 300 dpi (dots per inch) to avoid blurry results.
- For the U.S., passport photo resize must result in exactly 2x2 inches (51x51mm).
- Make sure the background prints white and evenly lit—no shadows or texture from your wall.
- Don’t trim your photo freehand. Use an exacto knife or a cutter and a ruler for a clean edge.
- Never laminate or alter your printed photo after it’s done.
For digital submissions, like renewing a passport online or applying for a visa, double-check the digital requirements. Some governments have strict rules about file size (often under 240 KB for the U.S.), JPEG format, and image dimensions in pixels. Set these before saving your photo to dodge upload errors.
- Ensure your digital photo is saved in JPEG/JPG format.
- Use sRGB color profile—most passport websites mention this.
- Check that the dimensions match the requirements, like 600x600 pixels minimum for U.S. passports.
- Keep file size small but sharp—don’t over-compress or your face gets pixelated.
Here’s a quick reference for commonly required printing and digital specs:
| Requirement | Printed Photo | Digital Photo |
|---|---|---|
| Size | 2x2 inches (US), 35x45mm (EU) | 600x600 px (US) |
| Paper Type | Matte or glossy photo paper | n/a |
| Background | Plain white or off-white | Plain white or off-white |
| Format | n/a | JPEG/JPG |
| File Size Limit | n/a | 240 KB (US online) |
Final tip: save your edited photo in a few spots—maybe cloud and phone—so if a site crashes or rejects your first upload, you’re not starting from scratch. Trust me, nothing’s more annoying than hunting for that perfectly cropped image at the last minute.