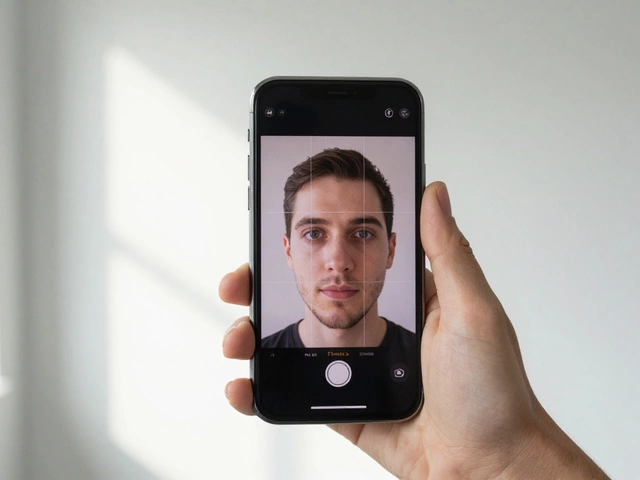
Ever tried uploading a passport photo and got that annoying 'File size too large' or 'Wrong dimensions' message? It's pretty common—and super frustrating if you don’t know where to start. The good news? You can solve this with a few taps using free apps or online tools designed to resize photos, even if you’ve never edited a picture before.
The trick is knowing which apps actually work and which ones make your life harder with watermarks or complicated steps. Go for tools that let you set exact dimensions (like 2x2 inches for a US passport photo), offer cropping guides, and save in the right formats. Most people want something that takes a few seconds instead of an hour fiddling and failing.
Quick tip: Don’t just shrink the image—passport photos have strict size and ratio rules. A good resizing app will help you keep your head centered and within the frame, so you don’t end up with a photo you can’t use. Ready to find out your best options and stop stressing about passport photos? Let’s get into it.
- Why You Need to Resize Your Passport Photo
- Best Free Apps and Online Tools
- Common Pitfalls and How to Avoid Them
- Quick Tips for Picture-Perfect Sizing
- Getting Your Photo Ready for Upload or Printing
Why You Need to Resize Your Passport Photo
Resizing your passport photo isn’t just about making it fit in a box. Most countries have super strict rules about the size and layout of these photos, otherwise your application gets rejected. For example, the U.S. requires a physical passport photo to be exactly 2x2 inches, and your face has to be between 1 and 1 3/8 inches from chin to top of head. If you’re even a bit outside those limits, you’ll have to retake the picture. That means more hassle, more costs, and more waiting.
On top of size, the government also wants a specific head position, white background, and even a decent resolution. Sending an oversized file, or one that’s too blurry or pixelated, can mess things up fast. If you’re applying online, you’ll run into upload errors if the image doesn’t meet file size or format requirements—most systems want JPEG or PNG files, usually under 240 KB.
- Free app tools help you nail these exact specs so you don’t waste time or get rejected for something fixable.
- Resizing keeps your face the right size in the frame, not too small or chopped off.
- Editing helps you crop out extra space and deal with backgrounds, so your photo isn’t rejected for silly reasons.
People often wrongly assume their phone’s default camera app is enough. But regular photos rarely match passport photo rules straight out of the camera. A little resizing saves you from loads of unnecessary stress and back-and-forth with government offices. Plus, if you plan to print your photo, exact sizing means you won’t get weird results from the photo lab.
Best Free Apps and Online Tools
If you’re searching for a free app to resize photos, your options range from easy websites to popular phone apps. No need to mess around with complicated software—these tools get the job done fast, even if you’re clueless about editing.
Here are some top picks people actually use for making passport photos:
- Passport Photo Online (Web, Android, iOS): This tool isn’t just for resizing. It has auto-cropping for passport rules in dozens of countries, plus a background remover. You can try it for free, though the high-res download sometimes asks for payment.
- PhotoAiD (Web, Android, iOS): This is great for quick resizing. Free previews let you check if your head is in the right spot. Want high-res files? Sometimes you can nab them free during promo periods.
- Fotor (Web & App): Drag and drop your image, pick exact pixel or size in inches, and it spits out a resized file right away. No sign-up needed. Extra features like cropping and background changes are also free.
- Pixlr (Web & Mobile): Super simple slider to change image size. Not passport-specific, but if you know your needed sizes (like 600x600 px), it’s fast and reliable.
- Snapseed (Android & iOS): Owned by Google, this app is easy to use and packed with editing tools. Look for the ‘Crop’ and ‘Resize’ under ‘Tools’. You have to set the size manually—but it’s accurate.
What about traditional photo editors like Paint (Windows) or Preview (Mac)? Sure, they’re free and good for quick fixes, but expect more trial and error to nail passport-specific sizes.
Let’s see how these apps stack up. Here’s a simple table comparing core features:
| App/Tool | Auto Resize | Background Erase | Passport Templates | Free Download |
|---|---|---|---|---|
| Passport Photo Online | Yes | Yes | Yes | Limited |
| PhotoAiD | Yes | Yes | Yes | Sometimes |
| Fotor | Yes | Yes | No | Yes |
| Pixlr | Yes | No | No | Yes |
| Snapseed | Manual | No | No | Yes |
Remember to check the saved image size before uploading. Most U.S. passport photos need to be exactly 2x2 inches or 600x600 pixels. Look up the requirements of your country to avoid redoing your pic. And, while some apps limit hi-res downloads for free, a screenshot in full quality can be a decent workaround.

Common Pitfalls and How to Avoid Them
It’s easy to trip up when trying to resize photos for passports, especially if you’ve never done it before. One of the biggest mistakes is getting the dimensions wrong. Most countries have specific size rules—like the US needing exactly 2x2 inches, while Canada uses 50x70 mm. Using the wrong size will get your photo rejected right away.
Another classic pitfall is poor resolution. Some people use apps that shrink the image so much it turns blurry or pixelated. When you print or upload a photo like that, the agency won’t accept it. Always check that your final image is at least 300 DPI (dots per inch)—otherwise, you’re starting over.
Bad cropping is another sneaky problem. Your head needs to be centered, with the right amount of space above and below (not too much shoulder, not too little forehead). Apps that don’t offer passport templates or guides make this super easy to mess up. Lighting can also ruin a photo fast—overexposed or dark backgrounds don’t fly.
- Always double-check the requirements for your country before resizing photos. Even small mistakes, like the wrong background color or head being too big, mean your photo won’t work.
- Pick apps that let you choose custom sizes and show clear cropping tools made for passport standards.
- Save photos in the right format. Usually, JPEG is safest, and the file size often needs to be under 240KB for online uploads.
Look at the stats below to see how common certain mistakes are:
| Common Error | % of Rejected Photos (US Dept. of State, 2023) |
|---|---|
| Wrong dimensions | 42% |
| Poor resolution or blurry | 29% |
| Incorrect head position | 18% |
| Bad lighting/background | 7% |
| Wrong file format | 4% |
If you avoid these simple traps, you’ll get a usable passport photo on the first try. That means less stress, fewer retakes, and no last-minute headaches when you need your documents.
Quick Tips for Picture-Perfect Sizing
Getting your passport photo just right is easier when you know what rules to follow and which steps make your life simpler. There's no need to guess—most countries have clear guidelines that any decent free app or online tool will mention up front. Stick with these tips to dodge the photo rejections that make you want to pull your hair out.
- Set the Exact Dimensions: For a US passport photo, go for 2x2 inches (51x51mm). European countries usually use 35x45mm. Double-check your country’s requirements online—it saves a lot of hassle.
- Frame Your Head Right: Your head should fill between 1 inch and 1 3/8 inches high in the frame. Most photo tools will show a guideline or grid—use it! Your chin shouldn’t be at the very bottom, and don’t crop out the top of your hair.
- Pick a Neutral Background: White or plain off-white—don’t risk a background with shadows or textures.
- Watch Out for Lighting: Avoid heavy shadows and direct sun. Faces must be evenly lit, with no weird glows or reflections. Stand facing a window for natural light if you don’t have a ring light.
- Don’t Edit Out Blemishes: Any “beauty filter” can get your photo rejected. Clean up for the camera, but don’t try to fool the system with software tweaks.
- Save in the Right Format: JPEG is the standard for most passport upload sites. If you download from a free resizing tool, make sure it saves as .jpg or .jpeg, not .webp or PNG, unless the official site accepts those.
Check out this table to compare some specific sizing requirements that can make or break your application:
| Country | Photo Size | Head Size | Background |
|---|---|---|---|
| USA | 2x2 in | 1–1 3/8 in | White/off-white |
| UK | 35x45 mm | 29–34 mm | Cream/gray |
| India | 51x51 mm | 25–35 mm | White/light |
Don’t forget to keep your shoulders straight, eyes open, and your face neutral—no huge smiles. Your future self will thank you when there’s no need for a retake.

Getting Your Photo Ready for Upload or Printing
Alright, so you’ve used a free app to resize your photo for your passport. Before you upload or print it, there are a few things you really don’t want to mess up. Most rejected passport photos fail because of some simple mistakes that you can totally avoid if you know what to watch for.
For uploads, check these three points:
- Format matters. Almost all online passport applications accept only JPEG or JPG. PNG may work sometimes, but stick with JPEG to be safe.
- File size is tricky. Most countries want your photo file to be between 50kb and 10MB. If it’s too small, the photo looks crappy and gets rejected. Too big, and the website won’t accept it.
- Dimensions are strict. For a US passport, your image needs to be 2x2 inches (600x600 pixels minimum, 1200x1200 pixels maximum). Different countries have different rules, so double-check before you hit upload.
Printing? Here’s what you need to know:
- Resolution counts. Always print at 300 dpi (dots per inch) or higher. Anything less, and the image looks pixelated, which is an instant fail at most passport offices.
- Glossy photo paper is the standard. Matte can work, but glossy is safer if you use a drugstore kiosk or order online. Regular copier paper is never accepted.
- Use a fresh print. No scratches, folds, or faded colors. Even a tiny blemish can lead to rejection.
If you’re uploading or printing at a shop, ask them to not add auto filters or corrections. Most apps and websites will offer a “passport photo” option to basically lock in the right size and ratios, but it never hurts to double-check.
Here’s a quick table to keep these facts straight:
| Requirement | For Upload | For Printing |
|---|---|---|
| File Format | JPEG (preferably), JPG | JPEG/JPG or direct print |
| Size | 50kb - 10MB (varies by country) | 2x2 inches for US (check your requirements!) |
| Resolution | 600x600 to 1200x1200 pixels | 300+ dpi |
| Paper Type | — | Glossy photo paper |
Don’t trust your phone or printer defaults—they’re set up for normal photos, not passport standards. Always go back and do a quick check, or use an app with a clear passport photo mode. That tiny bit of extra care saves tons of time and hassle later on.