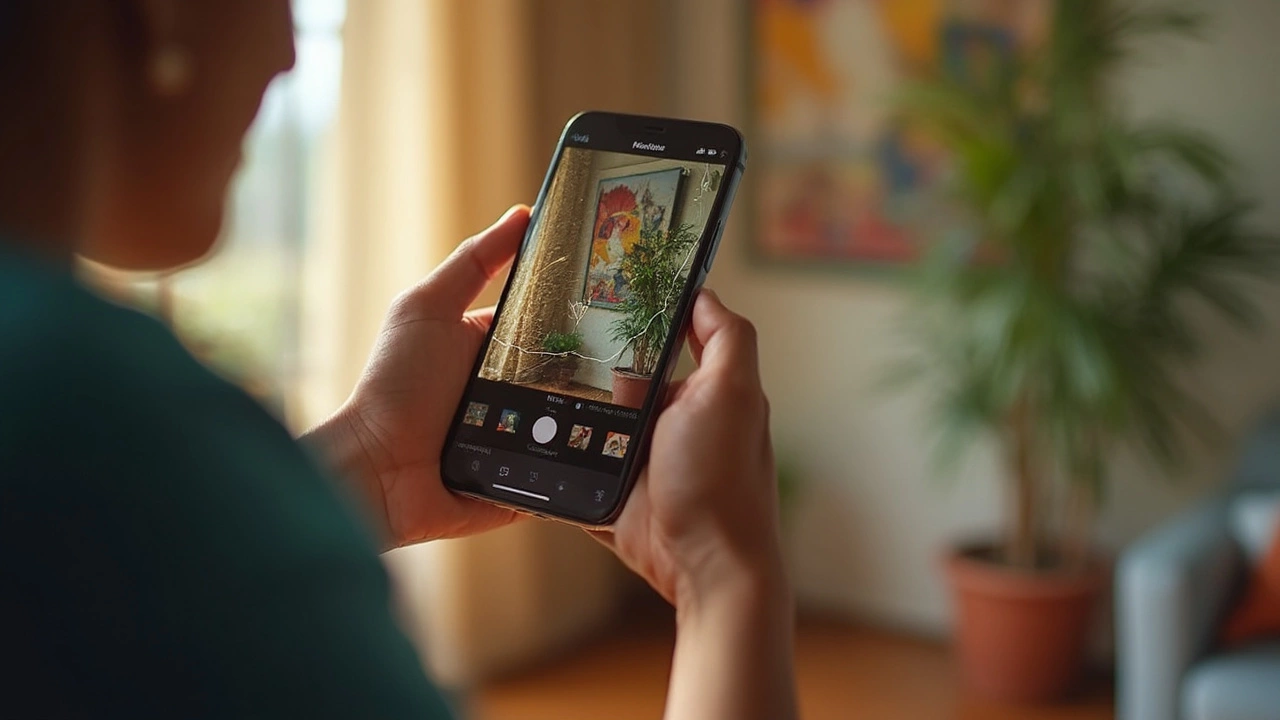
If you're like me, you love snapping a good photo on your iPhone. The question is, do you really need a fancy app to make your pictures pop? Believe it or not, Apple gives you a pretty solid tool right out of the box—the Photos app. No, it's not just for storing memories. It’s got some legit editing features too, and yep, they're free.
The Photos app isn’t just about keeping your pictures in neat albums. You can adjust lighting, crop out your best friend who's making a weird face, and even throw on a filter to give that sunset the justice it deserves. Best part? You don’t have to spend a dime.
Now, don’t go expecting Photoshop-like magic. But for quick changes, it’s a dream. Most people don’t even know half of what this handy app can do. Keep reading and you might discover a few tricks you didn't even think were possible without splashing some cash or cluttering your phone with extra apps.
- The Basics of Apple's Photos App
- Editing Features Available for Free
- Tips for Enhancing Your Photos
- Comparing Photos App to Third-Party Options
- Common Mistakes to Avoid
- Why You Might Still Want Additional Apps
The Basics of Apple's Photos App
So, you're wondering if the iPhone really has a solid photo editor without costing you a cent? Absolutely, thanks to Apple's built-in Photos app. This gem is standard on every iPhone, and it's not just for collecting all your snaps. It’s secretly a nifty tool for editing your photos without having to hunt down a third-party app.
First things first, let's talk layout. On opening the Photos app, you're greeted with your library, which honestly can be a little overwhelming if you’re a serial shutterbug like me. Swipe to the right tab, and boom, you're in the ‘For You’ section, where the app does some AI magic to pick and highlight your best moments. Handy, right?
When you're ready to edit, tap on any photo and hit ‘Edit’. This opens a world of options—adjust lighting, contrast, and even add filters. All the basics are there like cropping, rotating, and flipping your image. Plus, you can use the ‘Auto’ button if you're feeling lazy or just need a quick fix.
- Lighting and Color Adjustment: This is your bread and butter for any basic editing. Play with exposure, brilliance, shadows, and all that jazz.
- Cropping Tools: Get rid of that random pedestrian photobombing your shot or fix the horizon level.
- Filters: Choose from a range of presets that add different vibes, whether you want moody or vivid.
What makes the Photos app pretty decent is its ability to sync across Apple devices. Start editing on your iPhone during your commute and pick it up on your iPad at home without missing a beat.
But here’s a tiny catch—it’s built for quick, straightforward tweaks. For folks who want to dig deep into layers and maskings, you might still crave more than what this app offers. But for most casual users, Photos totally covers the essentials.
Editing Features Available for Free
You might be surprised at what Apple's iPhone photo editor can do, all without costing you a cent. The Photos app is pretty stocked with tools to touch up and tweak your pics so they’re social media ready. Let’s dig into what’s actually at your fingertips.
First off, there’s the basics like cropping and rotating—super handy for focusing on what matters in the shot or straightening out a skewed landscape. Just tap the 'Edit' button, hit the crop icon, and you're in. Here, you can also adjust the aspect ratio, which is great for those times you need a square pic for Instagram.
Beyond cropping, the app offers brightness adjustments and color tweaks. Tapping on the magic wand icon uses auto-enhance to smartly tweak your photo. If you like to have more control, you can manually tweak exposure, highlights, and shadows to your heart’s content. This can make a drab photo pop with life just by playing around a little.
Have a photo that’s a little too dark? Bring up its brightness, or play with the contrast for drama. For colors, adjust the saturation if you want those apples to look extra red or a sunset to burst with hues.
Then there’s the filters. Just like those apps everyone seems to use, your iPhone comes with built-in filters. These filters range from flashy to simple and can change the mood of your photo in an instant. Tap through them and watch your photo transform—you might find a look you didn’t even know you were going for.
Want even more customization? Dive into the 'Adjust' section where you can mess with warmth, tint, sharpness, and more. It’s reminiscent of having a mini professional editor right there on your phone, all for free.
While it’s not sporting all the bells and whistles of some professional-grade apps, the iPhone's built-in tools definitely punch above their weight for everyday photo editing. Whether you’re a casual snapper or an amateur shutterbug, mastering these features can really up your photo game.
Tips for Enhancing Your Photos
Alright, so you’ve got this cool iPhone photo editor built into your Photos app, and you're wondering how to use it like a pro. Here’s the lowdown. First things first, don't shy away from experimenting. Play around with every tool until you get what looks good.
Start with the basics. Cropping and straightening your image can already make a world of difference. If you've snapped a crooked horizon on vacation, the straighten tool is your best friend.
Next up is adjusting brightness and contrast. A photo that’s too dark or too light can really dull its impact. Bump up the brightness to lighten things up, and tweak contrast to add depth.
- Cropping: Trim any unnecessary background or distractions. Focus on what matters.
- Brightness & Contrast: Use these to adjust the lighting in your photo, bringing details into focus.
- Filters: Use them wisely to enhance moods. The right filter can make your photo feel warm or give it a moody vibe.
Don’t forget to try out the 'Auto-Enhance' feature—it’s like having a mini editor in your pocket. Tap the magic wand icon and see what happens; sometimes, it gets things just right!
Want some more customization? Dive into fine-tuning options like Shadow adjustments and Highlights. Darken the shadows to make colors pop, or soften highlights to bring out texture without overloading on bright spots.
Ever heard of the Vignette effect? It’s perfect for drawing attention to your subject by darkening the edges. Just don’t overdo it—it should be subtle.
Finally, if you're really getting into it, check out the built-in editing tutorials Apple provides. They’re a hidden gem. Trust me, these quick lessons can give you new insights.
Remember, practice makes perfect. Play around with these features on your next batch of photos and watch your skills grow.
Comparing Photos App to Third-Party Options
Alright, you've got the iPhone photo editor in your pocket—literally—with the Photos app. But are there moments you feel it's a bit, well, basic? Let's weigh this against flashy third-party apps like Snapseed, VSCO, or Adobe Lightroom.
Apple's Photos app is no slouch when it comes to the basics. It can handle cropping, rotating, and adjusting brightness or contrast like a pro. You even get nifty filters to play with right in the app. For many quick edits, it’s a go-to.
But now, take Snapseed. This tool lets you do things like selective adjust, allowing you to edit just parts of the photo. And what about VSCO? It’s king when it comes to filters, offering a range more extensive than your morning coffee choices. Lightroom, on the other hand, offers detailed editing—everything from tweaking individual colors to advanced blemish removal.
Third-party apps also often have built-in communities where you can share your photos and discover new trends. It's a social place right within the editing app.
So, let's lay it out:
- Intricacy: Third-party apps can offer more advanced tools for serious editing.
- Social Features: They usually have sharing features and communities.
- Cost: Many have both free options and premium subscriptions for extra features.
With the Photos app, simplicity is the game. It’s perfect for fast edits and sharing with friends. But if you're trying to impress on Instagram or enter a photography contest, those third-party options might give you the edge. It all depends on what you're looking to achieve with your edits.
Want a cheat sheet for quick comparison? Here's a simple table for you:
| Feature | Photos App | Third-Party Apps |
|---|---|---|
| Basic Edits | Available | Available |
| Advanced Tools | Limited | Extensive |
| Filters | Basic | Wide Variety |
| Social Sharing | No | Usually Yes |
| Price | Free | Free & Paid Versions |
Common Mistakes to Avoid
Alright, you're all set to spruce up your photos using your iPhone's free photo editing features. But hold your horses! There are some pitfalls you might want to dodge along the way. Let's start with some common blunders folks make while using the Photos app on an iPhone.
Going Overboard with Filters: Seriously, it's tempting to go all-in with those dramatic filters, but less is often more. A heavy-handed filter might make your photo look unnatural. Try to use filters sparingly to keep things looking genuine.
Over-cropping Photos: Sure, you want to crop out that photobomber, but be cautious about cutting too much. You might lose essential details or alter the composition. A good crop complements the subject without making it unrecognizable.
Ignoring the Power of 'Auto': Some users think their artistic touch is better than the app's automatic features. The 'Auto' function is an underrated gem in the Photos app. It can do wonders to quickly improve lighting and color balance with no fancy skills required.
Saving Over Originals: Always keep your original photo intact. If you save the edited version over the original, you're erasing your starting point forever. Make a duplicate before you start playing around, just in case you want to revert to the original.
And here's a fun fact for the data fans! Did you know that 75% of smartphone users edit photos directly on their devices? So, you're not alone in this, but avoiding these slip-ups will surely give you an edge in creating those Instagram-worthy shots!
Why You Might Still Want Additional Apps
So, you've been dabbling with the Photos app on your iPhone, and it's not bad, right? But let's be real—there's a reason folks turn to other options. Those native tools are super handy for basic tweaks, but when you want to get all artsy, you might need to consider adding some extra apps to your repertoire.
Take Adobe Lightroom, for example. If you're serious about photography, Lightroom offers advanced editing tools that let you fine-tune every detail. We're talking next-level stuff like selective edits and tone adjustments that you just won't find in the basic photo editor settings.
Another big player is VSCO. This app is loved for its extensive range of filters that can make your images look as if they were captured by a pro. Plus, its community aspect can be fun if you're into that social sharing scene.
If you're into graphic design, apps like Canva bring creative elements that let you create all sorts of fun projects, from Instagram Stories to custom posters.
Even though the Photos app covers the essentials, additional apps can open up possibilities. Here’s why some folks find them worth the download:
- Advanced Tools: Extra control over color, shadows, and highlights.
- Special Effects: Options like double exposure or artistic overlays.
- Community Features: Share and get feedback from a community of creators.
- Presets and Filters: Quickly apply professional-quality adjustments.
And hey, while we're here, a quick fun fact: a survey found 70% of amateur photographers use more than one editing app to achieve their desired look. Crazy, right? At the end of the day, the main takeaway is to keep experimenting and have fun with it. Whether you stick with the free stuff or explore paid options, it's all about making your photos as unique as you are.
