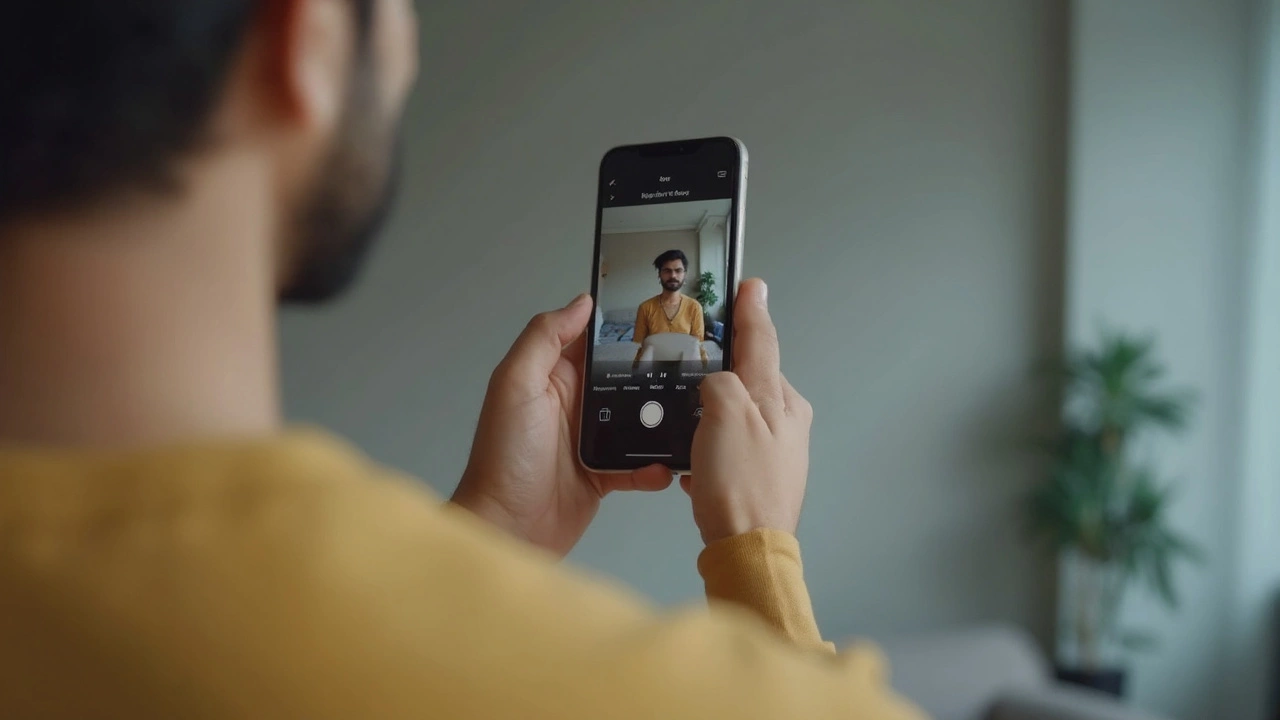
Tired of spending cash at photo studios? Want to snap a perfect passport photo from the comfort of your home? Well, it's definitely doable, and I'll show you how to get it right using just your iPhone. You don't need to be a pro photographer for this. Seriously, if you can take a basic selfie, you're more than capable of following these steps.
First up, lighting. It's so underrated, yet crucial. Natural daylight is your best friend here. Find a spot at home where daylight floods in without casting harsh shadows. Nobody wants a passport pic with shadows that make you look like a Halloween character.
Next, the background. Keep it simple, plain, and neutral. A white wall is ideal. No fancy paintings or busy patterns. Just you, looking straight into the camera with that classic neutral expression that's neither here nor there.
Then, it's about getting the angle right. Keep the phone at eye level and slightly away from your face to avoid any distortion. Arm a little out but steady – remember, small adjustments make a big difference.
- Getting the Right Lighting
- Finding the Perfect Background
- Positioning Yourself Correctly
- Using iPhone’s Camera Settings
- Editing and Printing Your Photo
Getting the Right Lighting
Getting the lighting right is the secret sauce for snapping that perfect passport photo with your iPhone. It's like making sure the sun shines on the most flattering parts of you. No professional lighting needed; just some good old natural light can do wonders.
Firstly, find a big window that lets in a ton of natural light. Early morning or late afternoon light works best because it's softer and doesn't throw harsh shadows on your face. Avoid direct sunlight though, as it can cause squinting and harsh contrasts.
Avoiding Shadows
The goal is to have even lighting without shadows, especially on your face. To achieve this, try to stand facing the light rather than having it come from behind or from one side. If possible, use some blinds or curtains to diffuse the light nicely.
"Bad lighting can ruin a good picture, while good lighting can make a bad picture great." — Michael Freeman, Photographer and Author
Once you've found your spot, do a test shot. If shadows are appearing on your face, try stepping back or repositioning slightly. Sometimes even a small change can drastically improve the light.
Lighting Accessories
- Reflector: You can use a white board or sheet to bounce some light back to your face. It's a simple trick that photographers swear by.
- Ring Light: If you're struggling to find good natural light, a ring light can be a quick fix. It's small, portable, and provides consistent lighting.
So, remember, your iPhone camera is only as good as the light it's working with. Master the lighting, and you're halfway to getting that perfect passport photo at home.
Finding the Perfect Background
Setting up the right background is crucial for a proper passport photo. You want something that looks professional—passport photo quality—but you’re doing it at home, so simple is better.
Why Simple Works Best
When choosing a background, think about plain and neutral colors. White, light grey, or beige walls are ideal. If your walls don't quite fit the bill, improvise a bit. Hang a large plain sheet or a piece of fabric to serve as a temporary backdrop.
This is crucial because busy or colorful backgrounds not only look unprofessional but can easily lead to your photo being rejected. Remember, a passport photo is meant to clearly show your features, so the less distraction in the background, the better.
DIY Hacks for a Professional Look
Stuck with bright colored or patterned walls? No worries. You can try:
- Temporary Sheets: Use a plain bed sheet taped or pinned securely. Just ensure there are no visible folds or textures.
- Poster Boards: They’re cheap and can be taped to the wall for a smooth finish.
- Shower Curtains: If you're really in a pinch, a plain white or light-colored shower curtain can work just as well.
Avoid using flash, as this can create unwanted shadows or reflections, particularly if your background isn’t completely matte.
Real-Life Examples: What Not to Do
| Poor Background | Why It Fails |
|---|---|
| Patterned Wallpaper | Distracting and unprofessional |
| Colored Wall | Can clash with your clothing or skin tone |
| Furniture in Background | Creates clutter and draws attention away from you |
A little planning and you’ll have that perfect iPhone passport-ready shot without setting foot in a studio!
Positioning Yourself Correctly
Now that you've got your lighting and background sorted, it's time to focus on how you position yourself. This part is crucial because even the perfect light can’t save a poorly posed picture.
Stand at the Right Distance
Start by standing about one arm's length away from your phone. This helps in keeping your facial features accurately represented without any awkward distortions. Remember, your iPhone camera lens isn't tailored to guessing distances, so using your arm as a guide keeps it consistent and straightforward.
Maintain a Natural Posture
Stand up straight with your shoulders relaxed. This is no time for your artistic side, so keep both the body and head facing straight at the camera. No sexy poses or tilted head – save those for Instagram!
Focus on Your Face
It's super important that your face occupies the right amount of space in the photo. Aim for your face, from chin to crown, to fill 1 - 1 3/8 inches of the image's height. Too small or large? Adjust the distance from your phone accordingly.
According to the U.S. Department of State, “A passport photo’s head must be sized such that the top of the head is between 1 inch and 1 3/8 inches from the bottom of the chin to the top of the head.”
Avoid Common Mistakes
Make sure there's no obstruction like hair – tuck it behind your ears or use a band. Eyewear should be plain if worn at all. Glasses should have no glare, and for most passports, you're better off skipping them unless medically necessary.
Avoid wearing anything on your head, unless it's religious, and ensure both eyes are open and visible. A neutral face is crucial – no big smiles or frowns.
Using Your iPhone's Features
The great thing about your iPhone, especially newer models, is the portrait mode. It helps in blurring out the background a bit, making sure you're the star of the show in the simplest way. But remember, rules prohibit any artistic filters – save those for when you send it to your friends for approval.
With these steps, your passport photo will be just as any studio could produce, minus the cost. Just remember, it's all about following these guides to the letter, and you're golden!
Using iPhone’s Camera Settings
Okay, you've got the spot and lighting sorted. Now let's dive into the nitty-gritty of your iPhone’s camera settings. What’s awesome about using an iPhone is that it packs a punch when it comes to taking photos, even something as precise as a passport photo.
Shoot in HDR
If your iPhone supports it, try using the HDR (High Dynamic Range) feature. It helps balance out the light and brings out details in both bright and dark areas, making sure your passport photo isn’t washed out or underexposed.
Grid Lines for Alignment
Swipe into settings and turn on the grid from the camera settings. Those lines might seem a bit much, but they’re super helpful in keeping things straight. Align yourself using the grid to keep your head centered and leveled, which is essential for passport photos.
No Zoom
When setting up the shot, resist the urge to zoom in. Instead, stand at the right distance (around an arm’s length away) and crop the photo later in an app. Zooming can pixelate the photo and mess up the quality.
Portrait Mode Options
If your iPhone supports Portrait Mode, you can use it but carefully. Adjust the depth effect to soften the background subtly without making it look artificial. However, this isn't necessary unless your background isn’t as clean as you’d like.
Resolution Counts!
Make sure to take the photo at the maximum resolution your iPhone allows. This keeps your image crisp when you edit or print it later. Here’s a quick stats table on iPhones and their camera specs:
| iPhone Model | Max Resolution |
|---|---|
| iPhone 13 | 12 MP |
| iPhone 12 | 12 MP |
| iPhone 11 | 12 MP |
These settings help you get the best shot without needing pricey gear or tricky setups. It’s really about using what you have—turning these handy settings into your personal photo studio right at home.
Editing and Printing Your Photo
Alright, so you've snapped your masterpiece. Now it’s time to give it a little digital makeover. But hey, don’t worry, you don't need Photoshop skills for this. Your iPhone has all you need to get a passport photo that's clean and official-looking.
Editing Using Apps
There are some nifty apps like Passport Photo Maker and ID Photo Done that simplify things. These apps typically offer templates where you can adjust the size your photo to the exact dimensions needed (2x2 inches for a U.S. passport). Follow these simple steps to get it right:
- Open the app of your choice.
- Select the photo you took.
- Position it correctly using the pre-made template.
- Use the editing tools to adjust brightness and contrast for that clean look.
Double-check to make sure your head is centered in the frame, and your face isn't too close or far. These apps also help with that.
Printing Your Photo
Once your masterpiece is edited, it's time to print it. If you’ve got a good home printer, you can use it. However, some folks prefer quality assurance, so they opt for a local print shop. Either way, here’s how to do it:
- Transfer the edited photo to your computer.
- Use standard photo paper—glossy usually works best.
- Print it as a 4x6 image. This allows you to fit multiple passport sized images and save paper.
- Cut the images down to 2x2 inches.
If you’re heading to a print shop, most offer the option to send the image via email or USB, and they’ll handle the rest. Costs are reasonable, averaging around ₹50 to ₹100 for a set of two photos.
And there you have it! From start to finish, you've made your own passport photo, saving yourself time and some cash. Cheers to your successful passport photo adventure with your trusty iPhone!