Passport Photo Size Checker
Key Requirements:
- 2x2 inches (51x51 mm)
- Head size: 1 inch - 1 3/8 inches (chin to top of head)
- Pure white background
- No shadows or reflections
- Neutral expression
Actual photo area (2x2 inches)
You need a passport photo. Fast. And you don’t want to pay $20 at the drugstore or wait in line at a photo booth. The good news? You can print a passport size photo at home - and get it right the first time. No guesswork. No failed attempts. Just a clean, government-approved photo that meets every requirement.
What exactly is a passport photo size?
A standard passport photo isn’t just a small picture. It has exact dimensions and rules. In the U.S., Canada, the UK, Australia, and most countries, the size is 2 x 2 inches (51 x 51 mm). The head must be centered, taking up 50% to 70% of the image height. Your face should be clearly visible - no hats, no shadows, no sunglasses. The background must be plain white or off-white. No patterns. No clutter.
Why does this matter? The U.S. Department of State rejects nearly 20% of submitted passport photos because of sizing or background errors. If you print it wrong, you’ll have to start over - and that costs time and money.
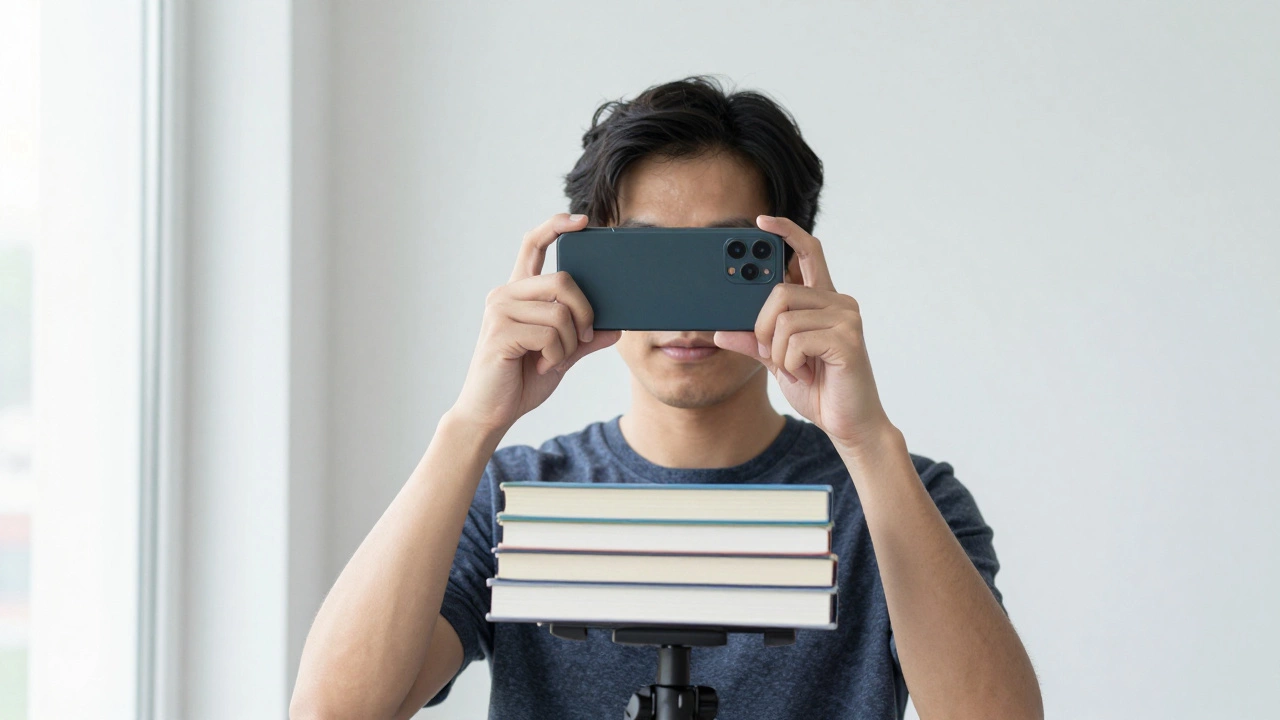
Step 1: Take the photo the right way
You can’t just snap a selfie and call it done. Passport photos need lighting, positioning, and framing that’s consistent. Here’s how to get it right:
- Use natural light. Stand near a window - no flash. Flash creates harsh shadows and shiny skin.
- Use a plain white wall as the background. Drape a white sheet if needed. Avoid windows behind you - they’ll overexpose the background.
- Use a tripod or stack books to hold your phone steady. Your face must be at eye level with the camera.
- Look straight ahead. No smiling. No teeth. Neutral expression. Eyes open and clearly visible.
- Wear regular clothes. No uniforms, white shirts (they blend with the background), or heavy makeup.
Pro tip: Use your phone’s portrait mode or a free app like Passport Photo Maker a mobile app that auto-crops and adjusts photos to passport standards to check your composition before taking the shot.
Step 2: Crop and adjust the photo
Once you have your photo, you need to crop it to the exact 2x2 inch ratio. Most phones and computers don’t let you do this precisely. Use a free tool like Canva a web-based design tool with passport photo templates or Adobe Express a free online editor with pre-set passport photo dimensions.
Open the tool, search for "passport photo", and upload your image. The template will show you where your head should sit. Adjust the crop so:
- Your chin is at the bottom of the frame.
- The top of your head is about 1/8 inch from the top edge.
- Your eyes are level with the horizontal center line.
Then, adjust brightness and contrast. Your face should look natural - not too dark, not washed out. If your skin looks gray, bump up the brightness by 5-10%. If the background isn’t pure white, use the "white balance" tool to clean it up.
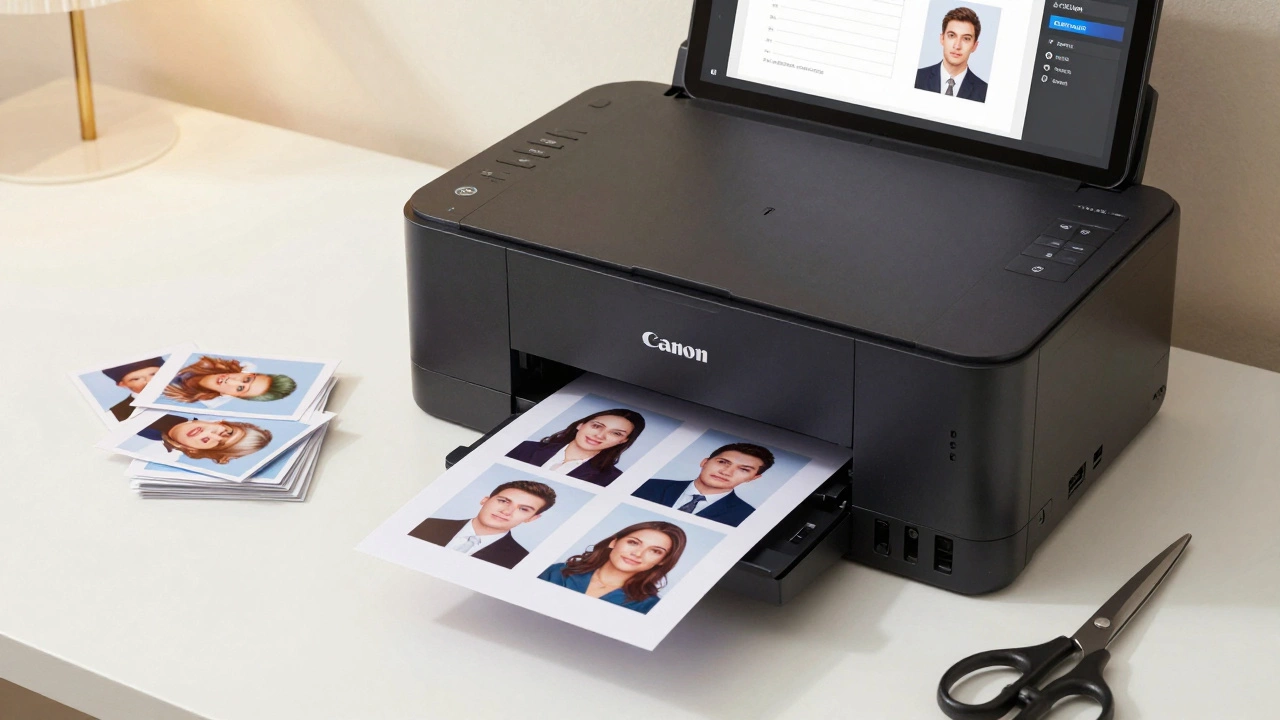
Step 3: Print it on the right paper
You can’t print a passport photo on regular copy paper. It needs to be photo-quality paper. Why? Because government offices scan these photos. If the ink bleeds or the paper is too thin, your photo will be rejected.
Buy 2x2 inch photo paper - it’s sold in packs of 50 or 100. Brands like Epson a manufacturer known for high-quality photo paper and printers, Canon a leading brand in photo printing technology, or HP a major printer manufacturer with reliable photo paper options make it. Look for "glossy" or "semi-gloss" finish. Matte won’t work - it doesn’t scan well.
Set your printer to "photo quality" mode. If your printer has a "borderless" option, turn it off. You need clean edges. If you’re printing multiple photos on one sheet, make sure they’re spaced exactly 2x2 inches apart with no overlap.
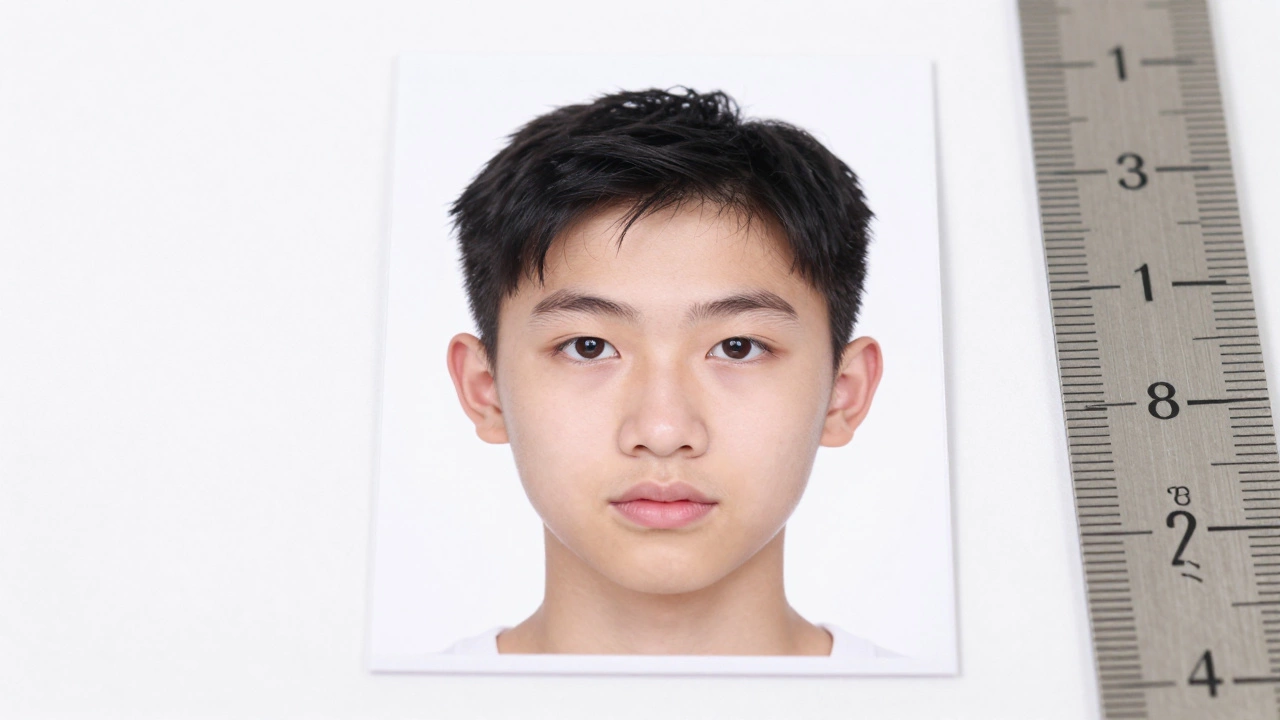
Step 4: Cut and check before you submit
After printing, cut the photo carefully with scissors or a paper cutter. Make sure the edges are straight. Then, check these five things:
- Is the background pure white? Hold it up to a bright light - no gray spots.
- Is your head the right size? Use a ruler. From chin to top of head, it should be between 1 inch and 1 3/8 inches.
- Are your eyes open and clearly visible? No eyelashes, no glare.
- Is there no shadow under your chin or behind your head?
- Are you wearing neutral clothing? No white shirts, no uniforms.
If it passes all five, you’re good. If not, print again. Most people need 2-3 tries to get it perfect.
What printers work best?
You don’t need a fancy printer. But not all printers deliver consistent results. Here’s what works:
- Canon PIXMA TS8220 - Excellent color accuracy, great for photo paper.
- Epson EcoTank ET-2800 - Low-cost ink, sharp details, no smudging.
- HP OfficeJet Pro 9025 - Reliable, fast, and handles photo paper well.
Avoid cheap inkjet printers that don’t have dedicated photo ink cartridges. They often print too dark or blur details. Laser printers? Skip them. They don’t reproduce skin tones well.
Common mistakes (and how to avoid them)
Here’s what goes wrong - and how to fix it before you waste money:
- Wrong background color - Use a white wall, not a curtain or a painted wall with texture.
- Too much headroom - If your head is floating, crop tighter. The top of your head should be close to the edge.
- Shadows - Move closer to the window. Use a white card to reflect light onto your face.
- Blurry eyes - Use a tripod. Even a slight shake ruins the detail.
- Printing on regular paper - Always use photo paper. It’s $5 for 20 sheets. Not worth risking rejection.
How much does it cost?
Printing at home is cheaper than you think. A pack of 2x2 photo paper costs $4-$8. Ink? If you already have a printer, it’s pennies per print. Most people spend under $10 total - including paper and ink. Compare that to $15-$30 at a photo booth or pharmacy.
And if you need multiple copies? Print 4-6 at once. You’ll have extras for visas, applications, or backups.
What if your country has different rules?
Most countries follow the 2x2 inch standard. But some don’t. Canada uses 35mm x 45mm. The UK uses 35mm x 45mm too. Australia uses 35mm x 45mm with a white background. Always check your government’s official passport website before printing. Search for "passport photo requirements [your country]" - you’ll find a PDF with exact specs.
Don’t guess. Don’t assume. A tiny difference in size can delay your application by weeks.
Final checklist before you mail it
Before you put your photo in the envelope:
- Photo is 2x2 inches (51x51 mm)
- Background is plain white or off-white
- No shadows, no glare, no reflections
- Face centered, eyes open, neutral expression
- Head size: 1 inch to 1 3/8 inches from chin to top
- Printed on photo paper, not regular paper
- Cut cleanly, no jagged edges
If all these boxes are checked, your passport photo will pass. No second chances needed. No extra trips. Just a clean, professional photo - printed at home, for less than a coffee.
Can I use my phone camera to take a passport photo?
Yes, as long as the photo meets all requirements. Use natural light, a plain white background, and hold the phone steady. Avoid selfies with filters. Use a tripod or stack books to keep the camera at eye level. Apps like Passport Photo Maker can help you check sizing before printing.
Do I need special photo paper?
Yes. Regular printer paper is too thin and doesn’t hold ink well. Government offices scan passport photos, and low-quality paper can cause rejection. Use glossy or semi-gloss 2x2 inch photo paper from brands like Canon, Epson, or HP. It costs less than $10 for a pack of 20.
Can I print multiple passport photos on one sheet?
Yes, if your printer supports it. Most photo paper comes in sheets with 4 or 6 pre-marked 2x2 inch boxes. Print all at once, then cut them out. Just make sure each photo is properly aligned and the background is clean on every one. Don’t overlap images.
Why is my passport photo being rejected?
The most common reasons are: wrong background (gray or patterned), head too small or too large, shadows under the chin, wearing a hat or uniform, or using regular paper. Double-check your photo against the official government guidelines. Use a ruler to measure the head size. If in doubt, print a test copy and compare it to a real passport photo.
Can I use a laser printer?
It’s not recommended. Laser printers often produce photos that look too dark or lack detail in skin tones. Inkjet printers with photo ink cartridges give better color accuracy and smoother gradients. If you must use a laser printer, test it first with a sample photo - and check if your country accepts laser-printed photos.